
C4D BASECAMP
The beginning of my 3D journey! This intense 6-week course (plus a few weeks for extended critique) is taught by the Cinema 4D guru himself, EJ Hassenfratz. The goal is to make beginners feel comfortable in 3D. I had little to no skills in 3D going into the course but I fell in love with it head over heels since the very first lesson. But the climb was steep….
baby’s first render - orientation week
The first week was about modeling using nothing but primitive objects (cubes, tubes, cylinders, etc). The theme was “your favorite place“. Since I took this course during peak-covid times, I couldn’t go to the gym. So I flexed my 3D muscles instead.

all work and no play makes jack a dull boY
One of the most crucial tools to have in your 3D arsenal is the spline tool, which allows you to freeform any geometry you can think of. The challenge was to write out a word with the VHS tape and making sure it’s nice and legible. I paid homage to one of my absolute favorite movies of all time.

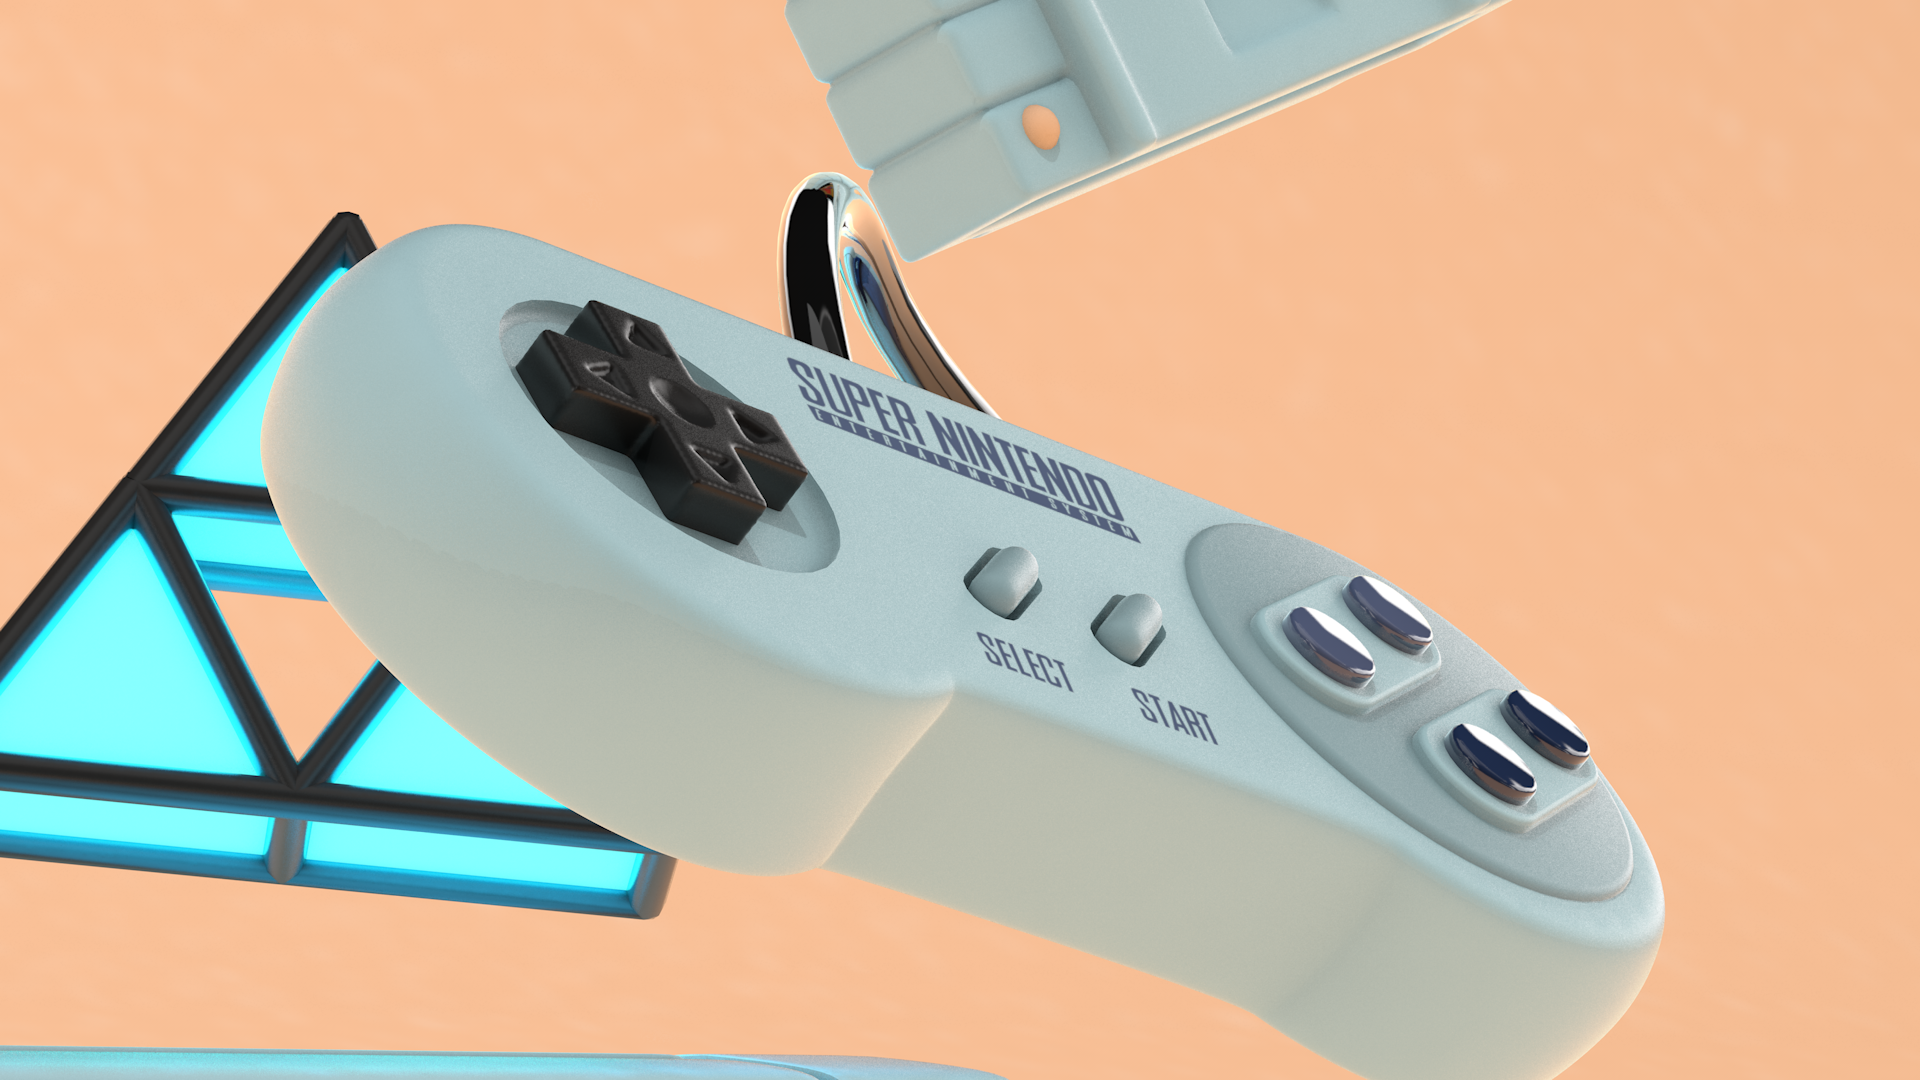
It's dangerous to go alone! Take this
Box modeling… two words that will give any 3D artist the heebie-jeebies. Rightfully so. Moeling is one of the most difficult skills to master in 3D. We were graciously given the choice to either model the NES or if we were feeling up to the challenge, model the SNES with its many rounded corners and edges that adds to the complexity of the assignment. I couldn’t resist and modeled the SNES along with references to arguably the best game ever.


let there be light
Remember the dope MTV graphics from the 90’s? Well it made a come-back… sort of. This week was all about lighting. We were given the faux MTV / GTV scene and were asked to light it in a way that conveys completely different looks: Film noir, morning show, Sci-Fi show and late-night show. We weren’t allowed to use any materials and just paint with light but in the following week, we got permission to throw the kitchen sink at it and go nuts with materials.


thirsty for some creative juice?
In this lesson we learned how to import image textures, how to layer reflections and really push the photorealism with HDRI images and lighting. No fancy third party renderers were used for this scene, only the built-in Physical Renderer.

smooth moves
OK, we’re getting our hands dirty with some animation now. The scene came fully modeled and we were tasked with texturing, lighting and animating this chain-reaction scene. Spoiler alert: Q-Bert finally gets his revenge after putting up Sam’s shenanigans all these years.
up in the air
Sam’s escaped Q-Bert’s trap and is taking to the sky. He’s still an untrained pilot, mind you, so poor guy got a little dizzy at the end. This one was focused on animating using splines. So much fine-tuning and tweaking to make it look smooth but I learned that the spline is animator’s best friend!
OK google, get me directions to
Cloners and the MoGraph module is one of many features that makes Cinema 4D so great! I was blown away by how quickly an entire little city can be built and animated with just a few keyframes. With A.I. creeping into our lives more and more, maybe one day we’ll see a whole map pop out from our phones… who knows.
my inner spielberg
Next stop on the nostalgia-train: camera moments and 8-bit characters up the ying-yang! For this :30 gaming show, the challenge was to add dynamic camera movement and finally land on the title card logo resolve. Had a ton of fun experimenting with depth of field and the mograh module to animate the text.
rock’em sock’em composit’em
Hope this one will knock your socks off (apologies for the bad pun)! This week was all about compositing. Admittedly not the most attractive topic, but one of the most important ones. The stat UI graphics as well as the screens are done entirely in After Effects and composited using mattes. I learned that with separate render passes (shadows, reflection, etc.) the final look can be art directed in the most precise way possible. Like EJ said, a render straight from C4D is not a finished video, at least throw some curves on it!
setting up camp
The ultimate challenge! Making a fully animated 15 second spot for fake client “explain.ly“. Everything from modeling, lighting, texturing to animating and compositing had to be done from scratch, based on an animatic and a voice over track.
It’s been a heck of a ride and I’m happy I climbed all the way to the top so to speak, (if we’re gonna keep following the basecamp analogy). Still have ways to go but this class got me absolutely hooked on 3D. On to the next course!